
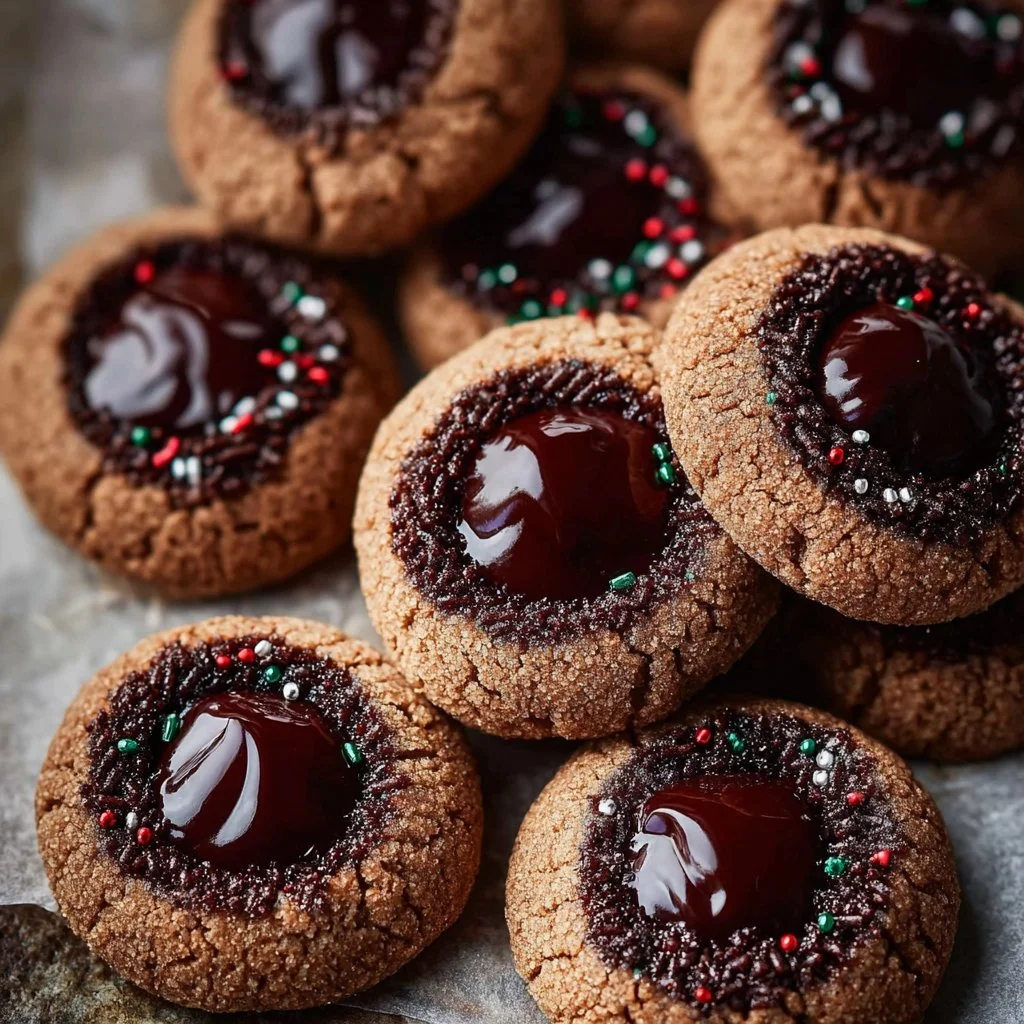
Chocolate thumbprint cookies boast a delightful combination of crisp edges, a soft center, and a rich chocolate filling that wins over hearts with every bite. Perfect for any occasion, these cookies are not just easy to make but also offer plenty of room for creativity. Whether you enjoy them as an after-school treat, a dessert for dinner, or a snack with tea, you’ll find that chocolate thumbprints quickly become a beloved addition to your baking repertoire.
Why We Love This Chocolate Thumbprint Cookies
These chocolate thumbprint cookies are a classic choice because they strike the perfect balance between sweet and rich, creating a delightful experience for anyone who dares to take a bite. The buttery cookie base offers a wonderful texture that contrasts beautifully with the luscious chocolate filling. They are versatile enough for casual snacking or dressed up for festive occasions like holiday gatherings and birthday celebrations. Moreover, the recipe is easy to follow and doesn’t require any specialized baking equipment, making it approachable for bakers of all levels. They also lend themselves well to personal touches, allowing you to adjust the filling or toppings to suit your preferences. Let’s dive into what you need to bake these delicious treats!
Ingredients for Chocolate Thumbprint Cookies
- 1 cup unsalted butter, softened
- 1 cup granulated sugar
- 1 large egg
- 2 teaspoons vanilla extract
- 2 cups all-purpose flour
- 1/2 cup cocoa powder
- 1/2 teaspoon baking powder
- 1/2 teaspoon baking soda
- 1/4 teaspoon salt
- 1 cup chocolate chips or chocolate ganache, for filling
Directions
- Preheat your oven to 350°F (175°C) and line your baking sheets with parchment paper.
- In a large bowl, cream together the softened butter and granulated sugar until light and fluffy.
- Add in the egg and vanilla extract, mixing until well incorporated.
- In another bowl, whisk together the all-purpose flour, cocoa powder, baking powder, baking soda, and salt.
- Gradually add the dry ingredients to the wet mixture, stirring until just combined.
- Scoop tablespoon-sized balls of dough and roll them into smooth balls. Place them on the prepared baking sheets, leaving space between each cookie.
- Using your thumb or the back of a teaspoon, gently create an indent in the center of each ball.
- Bake for about 12-15 minutes or until the edges look firm.
- Remove from the oven and allow the cookies to cool for a few minutes on the baking sheet.
- Carefully fill each indent with chocolate chips or ganache while the cookies are still warm, allowing them to melt slightly.
- Let the cookies cool completely before transferring them to a wire rack.
How to Serve Chocolate Thumbprint Cookies
Serving chocolate thumbprint cookies can be as simple or as elaborate as you wish. For a casual afternoon snack, place the cookies on a decorative plate and provide a few napkins. They pair wonderfully with a cup of coffee, tea, or milk, making them a delightful treat for a quiet moment by yourself or with friends. If you’re hosting a gathering, consider arranging them on a dessert table alongside other sweet treats. Garnishing them with a dusting of powdered sugar or drizzling melted chocolate on top can elevate their appearance. For a special occasion, use themed plates or add colorful sprinkles to engage children and make the cookies festive. These versatile cookies can also serve as a delicious addition to gift baskets or party favors—simply package them in clear bags tied with a lovely ribbon for a personal touch.
Expert Tips for Chocolate Thumbprint Cookies
To achieve the best chocolate thumbprint cookies, consider a few expert tips. First, use room temperature ingredients, especially butter and eggs. This simple tip helps the butter cream better, creating a lighter cookie. Second, ensure you don’t overmix the dough once you combine wet and dry ingredients; overmixing can lead to tough cookies. For the thumbprints, try to make the indents slightly deeper than you think you need, as some of the filling might bake into the cookie during the baking process. When making your filling, use high-quality chocolate for a rich flavor. If you choose to use ganache, let it cool slightly before filling the cookies, as this helps it hold its shape better. Lastly, be patient while cooling the cookies; filling a hot cookie with chocolate will melt it too much, which may spoil the presentation. Always trust your instincts, and most importantly, have fun experimenting with your baking!
How to Store Chocolate Thumbprint Cookies
Storing your chocolate thumbprint cookies properly will keep them fresh for longer. Once the cookies have completely cooled, place them in an airtight container. You can separate layers of cookies with parchment paper to prevent them from sticking together. Ideally, store them at room temperature in a cool, dry place where they can last for about a week. If you want to keep them even longer, consider freezing them. To do this, arrange the cookies in a single layer on a baking sheet and freeze them for about an hour. Once they’re firm, transfer the cookies to a freezer-safe bag or container. They can freeze well for up to three months. When you want to enjoy them, simply thaw the cookies at room temperature or warm them slightly in the oven for a few minutes.
Variations of Chocolate Thumbprint Cookies
While the classic chocolate thumbprint is delightful on its own, several variations can enhance your baking experience. Try incorporating different fillings to mix things up; jam or fruit preserves like raspberry or apricot can add a fruity contrast to the chocolate. For a fun twist, consider using nut butters, such as almond or peanut butter, for a nutty flavor. You can also experiment with flavor extracts; adding a touch of orange or peppermint extract to the dough can provide a refreshing twist. Spice lovers might enjoy adding a pinch of cinnamon or cayenne pepper to the dough for a warm kick. Changing the type of chocolate filling can yield amazing results as well; opt for dark chocolate, white chocolate, or even flavored chocolates to match your taste. Additionally, you can roll the cookie dough balls in chopped nuts, shredded coconut, or cookie crumbs before baking for an extra layer of flavor and texture.
FAQ about Chocolate Thumbprint Cookies
When making chocolate thumbprint cookies, you might have questions about the process or the best ways to enjoy them. Here are some frequently asked questions.
Can I use other types of chocolate for the filling? Absolutely! You can use dark, milk, or white chocolate, depending on your preferences. For a unique twist, try using flavored chocolates like mint or orange.
What should I do if my cookie dough is too soft? If your dough feels too sticky, consider chilling it in the refrigerator for about 30 minutes. Chilling will help solidify the butter, making it easier to handle and shape.
Can I make these cookies gluten-free? Yes! You can substitute all-purpose flour with a gluten-free blend that contains baking powder. Just ensure your other ingredients are also gluten-free.
How do I know when the cookies are done? The edges of the cookies should look firm and set, while the centers may appear slightly soft. They will continue to cook slightly as they cool on the baking sheet.
Can I freeze the dough? Yes, you can freeze the cookie dough before baking. Shape the dough into balls, flash freeze them on a baking sheet, and then transfer them to an airtight container. When you’re ready, bake directly from frozen, adding a couple of extra minutes to the baking time.
Enjoy your homemade chocolate thumbprint cookies and the pleasure they bring to every occasion!

Chocolate Thumbprint Cookies
Ingredients
For the Cookie Dough
- 1 cup unsalted butter, softened Use room temperature for best results.
- 1 cup granulated sugar
- 1 large egg Use at room temperature.
- 2 teaspoons vanilla extract
- 2 cups all-purpose flour
- 1/2 cup cocoa powder
- 1/2 teaspoon baking powder
- 1/2 teaspoon baking soda
- 1/4 teaspoon salt
For the Filling
- 1 cup chocolate chips or chocolate ganache Choose high-quality chocolate for best flavor.
Instructions
Preparation
- Preheat your oven to 350°F (175°C) and line your baking sheets with parchment paper.
- In a large bowl, cream together the softened butter and granulated sugar until light and fluffy.
- Add in the egg and vanilla extract, mixing until well incorporated.
- In another bowl, whisk together the all-purpose flour, cocoa powder, baking powder, baking soda, and salt.
- Gradually add the dry ingredients to the wet mixture, stirring until just combined.
- Scoop tablespoon-sized balls of dough and roll them into smooth balls. Place them on the prepared baking sheets, leaving space between each cookie.
- Using your thumb or the back of a teaspoon, gently create an indent in the center of each ball.
Baking
- Bake for about 12-15 minutes or until the edges look firm.
- Remove from the oven and allow the cookies to cool for a few minutes on the baking sheet.
- Carefully fill each indent with chocolate chips or ganache while the cookies are still warm, allowing them to melt slightly.
- Let the cookies cool completely before transferring them to a wire rack.